"It feels more like a spa experience than a teeth cleaning appointment."
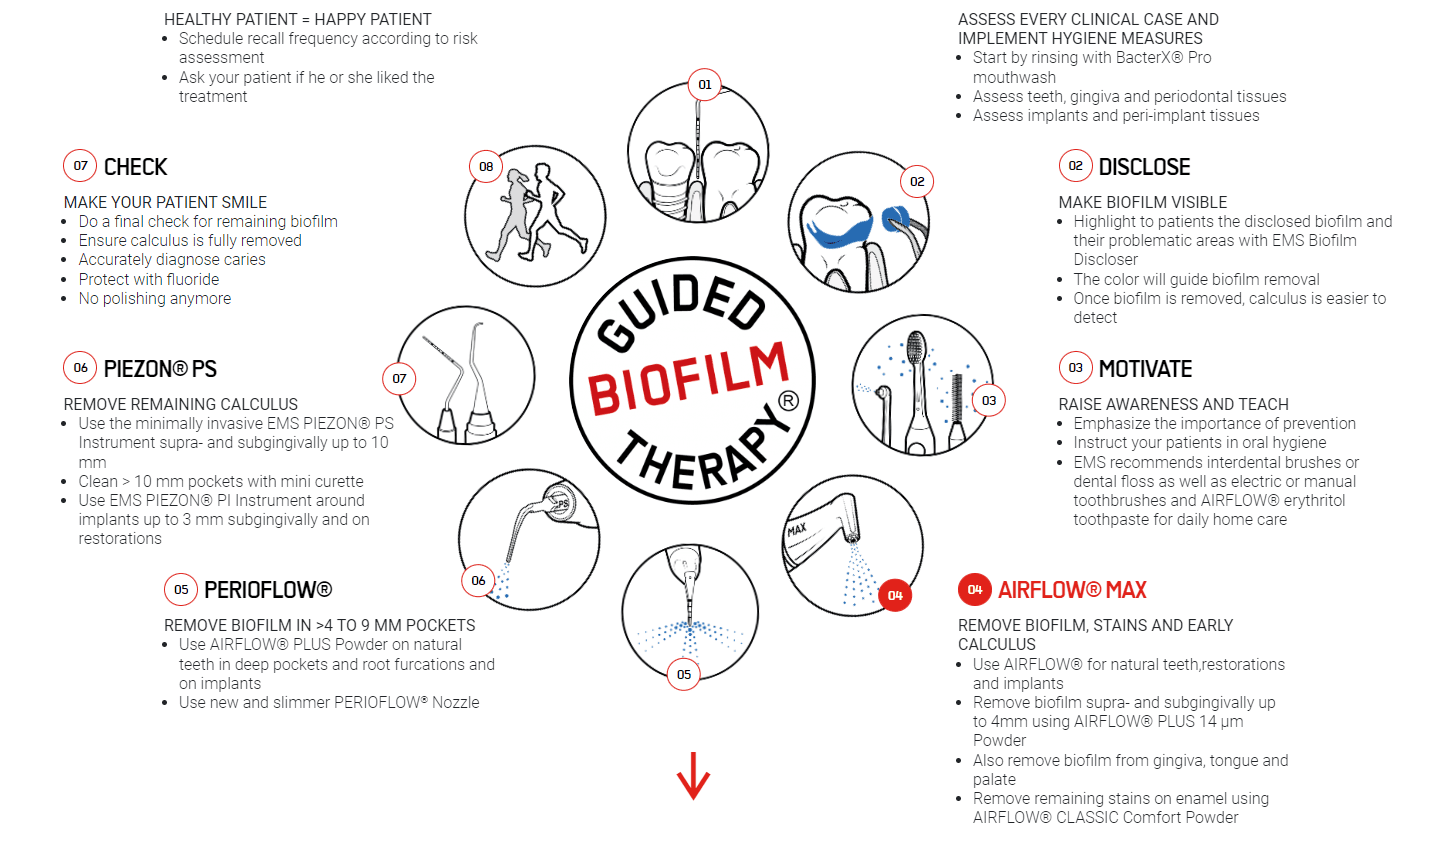
Step 2: Organic Dye is Applied
An organic dye is applied to your teeth to make the biofilm (aka plaque) visible. Biofilm is almost invisible to the naked eye.
Step 3: Personalised Health Recommendations
Now that the biofilm is visible, we’ll show you any problem areas we notice and give you personalised recommendations for proper oral care at home.
Step 4: AIRFLOW MAX® Technology
The AIRFLOW MAX® Technology works with erythritol powder to remove stains and biofilm from your teeth, tongue, cheeks, and surrounding soft tissues. It uses a gentle jet of air and warm water. Because AIRFLOW removes the biofilm, you won’t need the gritty, messy traditional polish at the end of your treatment.
Step 5: PERIOFLOW® Technology
PERIOFLOW® technology removes biofilm underneath the gums, gently and thoroughly. This step is only necessary in those patients with deep periodontal pockets.
Step 6: PIEZON® PS Technology
PIEZON® PS technology is used to remove any remaining hard deposits. PIEZON senses where calculus is and shatters it, so that it is more targeted and gentle than traditional ultrasonic instrumentation.
Step 7: Quality Control
A final check is carried out. Some minor hand scaling may be required if there is any calculus remaining after the above steps. Now that your teeth are clean, the dentist is better able to do your exam.
Step 8: Book Your Next Cleaning
We’ll book you in for your next cleaning before you leave the clinic, so you don’t have to worry about remembering.